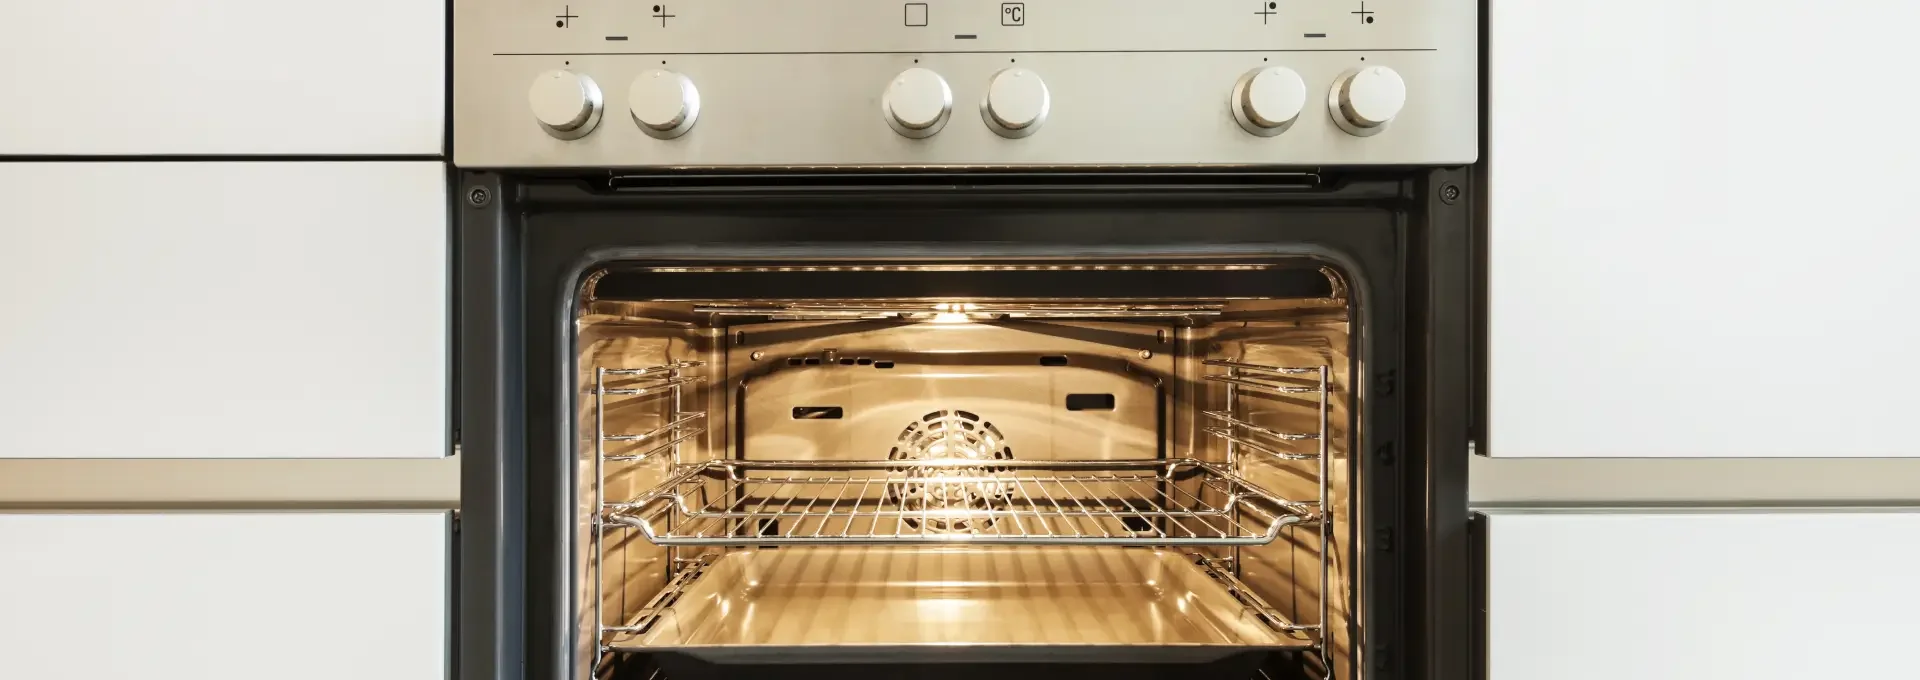
How to Clean Your Oven - The Best Tips
Baking cakes, pizza, and cookies—the oven is one of the most frequently used kitchen appliances. While it’s a joy to use for preparing, baking, and reheating food, the oven is unfortunately also one of the most challenging appliances to clean. Burnt-on food residue and grease stains on the glass, rack, and grates often make cleaning difficult. Furthermore, these can also affect the taste of future dishes and reduce the quality of new baked goods. A clean oven is not only a sign of a well-maintained kitchen, but also essential for several reasons:
Hygiene and Health:
Residues from baked-on food, such as cheese from casseroles or breadcrumbs from fish sticks, are not only unsightly but can also attract germs and bacteria. Especially in convection ovens, these particles are distributed throughout the interior by air circulation and can settle on freshly prepared food. In addition, baked-on residue can produce smoke at high temperatures or, in the worst case, even catch fire.
Efficiency and energy savings:
A dirty oven requires more energy to reach the desired temperature, as burnt-on residue hinders heat transfer. This not only leads to longer preheating times but also to higher electricity costs. A clean interior allows for even heat distribution and ensures that your oven operates more efficiently. This saves energy while also extending the lifespan of your appliance.
Optimal baking results and flavor:
Burnt-on residue can disrupt heat distribution in the oven and lead to uneven cooking. Clean surfaces reflect heat better and ensure even baking—for perfectly cooked food and an authentic taste experience.
Extending the lifespan:
Over time, baked-on food residue and grease can corrode the interior coating and lead to corrosion or damage. Regular maintenance protects the surfaces, prevents overheating, and helps keep your oven in working order for longer.
Regular cleaning of the oven prevents the buildup of dirt, unpleasant odors, and potentially harmful germs. This keeps your kitchen hygienic and preserves the flavor of your food. This way, you’re not only investing in the longevity of your appliance but also avoiding costly repairs or premature replacement. This comprehensive guide offers step-by-step instructions on how to clean your oven and provides valuable recommendations for proven methods—whether using household remedies or specialized cleaners. We’ll show you how to clean your oven and achieve the best results.
How do you thoroughly clean the oven?
Cleaning all oven parts—such as the glass door, racks, and baking tray—ensures hygiene, safety, and proper function. This leads to better baking results, reduces energy consumption, and prevents premature wear and tear. In addition, cleaning also prevents unpleasant odors and the buildup of bacteria. Especially in heavily soiled ovens, baked-on residue can cause dangerous smoke, which shortens the appliance’s lifespan and poses a health hazard. Light soiling can often be removed with simple household remedies, while stubborn, baked-on residue requires more intensive measures. But what exactly does that mean, and how often should the oven be cleaned? Isn’t there also a self-cleaning function?
Many modern ovens feature a pyrolysis function that turns baked-on residue into ash at temperatures of 450–500 °C. After the process—which can take one to three hours depending on the level of soiling—the remaining ash can be easily removed with a damp cloth. Manufacturers such as Siemens, Bauknecht, Bosch, and Neff have incorporated this cleaning feature. Activated carbon filters in ovens purify the air and significantly help reduce odors and grease. They consist of porous material with high adsorption capacity that filters odor particles, grease, and pollutants from the air. These filters are particularly common in convection ovens to minimize unpleasant odors during cooking and improve the air quality inside the oven. But if your oven doesn’t have these features what should you do? We’ll explain:
How often should you clean your oven?
Regular cleaning of these components is therefore a key part of oven maintenance and helps keep it in good condition. How often the individual parts of an oven should be cleaned depends on how frequently it is used and the types of food prepared. But what exactly does that mean, and how often does the oven need to be cleaned? Here is an overview of which parts should be cleaned and how often, as well as the factors that play a role:
- Oven interior: For light soiling (e.g., grease splatters or crumbs), a quick wipe-down after each use is recommended. A thorough cleaning should be done at least once every one to two months, or more frequently if the oven is used intensively. Regular cleaning prevents food from burning onto the surface and makes maintenance easier.
- Oven door glass: The outside should be cleaned once a week to remove fingerprints or dust. The inside can be cleaned as needed, depending on splatters or food residue. Splattering foods like lasagna or roasts, for example, often leave grease residue on the inner glass. Regular cleaning prevents stubborn residue from setting in.
- Grates and racks: If grease or food residue is visible, they should be cleaned after each use. At a minimum, however, clean them every one to two months to prevent baked-on grime. For example, direct grilling or roasting on the rack often results in heavy soiling that requires frequent soaking and cleaning.
- Baking sheets: These should be cleaned immediately after cooking or baking to prevent food from becoming encrusted. Whether you use parchment paper affects how dirty they get, as food can burn onto the surface more quickly without this protection.
- Ventilation and convection fan: To remove grease buildup that can obstruct airflow, it is recommended to clean these every six months. Regular frying or grilling leads to faster buildup.
- Oven racks and side panels: These should be checked for crumbs after each use. All grease residue should be removed here at least once every one to two months. Frequently sliding trays in and out can lead to buildup.
- Gaps and seals: Seals and gaps should be checked regularly for buildup and cleaned. This should be done at least every three to six months. Crumbs or liquids that get into the gaps can cause unpleasant odors.
Clean your dirty oven with Dr. Beckmann
It’s Sunday evening, and the family is looking forward to a delicious oven-baked meal. But as soon as you open the oven door, a cloud of smoke billows out. Burnt-on residue from the last time you baked has built up, and the unpleasant smell is dampening your anticipation of the meal. Now it’s time to clean the oven. But what’s the best way to clean it thoroughly yet gently? We’ll show you how:
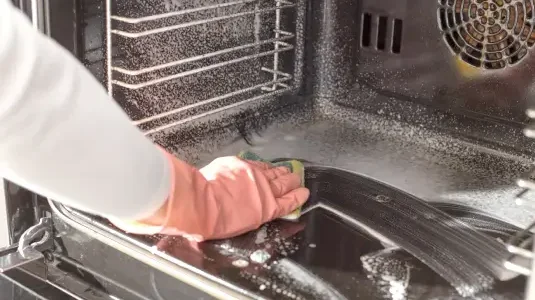
Preparation: Let the oven cool down after baking before you start cleaning. Remove the baking sheets and the rack. Carefully scrape off coarse food residue and loose crusts with a plastic spatula or a soft brush. Avoid using sharp objects to prevent damaging the surface. A damp sponge helps remove loose particles. Always wear gloves when using chemical cleaners and ensure adequate ventilation.
Removing stubborn encrustations and burnt-on residue from the interior:
Spray the cold surfaces with Dr. Beckmann Oven & Grill Power Gel and let it sit for at least 20 minutes. The gel formula, which adheres even to vertical surfaces, penetrates down to the deepest layers of even thick encrustations while being gentle on the material. For heavy soiling, you can let it sit on longer. After the recommended time, wipe the oven thoroughly with a damp sponge and then rinse the spray nozzle.
Important: Do not spray the Power Gel into fan openings or vents, as this can damage electrical components or the fan mechanism. Liquids and chemical cleaning agents can penetrate the sensitive electronics, cause corrosion, and impair the fan’s functionality. Additionally, there is a risk that residues from the cleaner will circulate in the air the next time the oven is used, which could cause unpleasant odors and even be harmful to health.
Cleaning grease residue from the oven window:
Use a damp cloth or sponge (e.g., kitchen sponge) to spread the kitchen cleaner evenly and clean the glass. Remove any residue with a fresh damp cloth and wipe dry with a dry kitchen towel.
Removing burnt-on food from the oven rack or baking sheet:
Lightly burnt food residue can be removed with a brush or a coarse sponge. For heavily burnt-on residue, we recommend an alkaline cleaner that breaks down and dissolves grease and encrustations. Dr. Beckmann Oven & Grill Power Gel, with its gel formula, penetrates deep into the lowest layers of encrustations while also being gentle on the material. Spray the oven rack or tray generously and let it sit for at least 20 minutes. Then wipe the rack or tray thoroughly with a damp sponge and, if necessary, place it in the dishwasher.
Removing grease residue from oven racks:
Depending on the user manual, you can remove the oven racks or clean them directly in the oven. Dr. Beckmann Oven & Grill Power Gel adheres even to vertical surfaces and can penetrate deep into the grime. To do this, spray the cleaner onto the oven racks and let it sit for at least 20 minutes. Leave it on longer if the grime is particularly stubborn. Once the cleaning time is up, wipe away the residue with a damp sponge and enjoy the pleasant grapefruit scent.
Note: Cleaning your oven may vary depending on the model and manufacturer. Be sure to read the user manual for specific recommendations.
Home Remedies for Burnt-On Food: Cleaning Your Oven Naturally
Cleaning an oven with natural home remedies is not only an eco-friendly method but also easy on the wallet. Natural ingredients like baking soda, vinegar, and lemon are found in almost every household and offer numerous benefits for both the appliance and you. Home remedies are usually gentle on the material, prevent buildup, and contain no toxic chemicals. Especially in an appliance used for food preparation, it’s a major advantage that these remedies don’t leave behind chemical residues that could end up in your food. Natural cleaners do not produce strong odors or fumes that could be bothersome during cleaning. Lemon juice, for example, even leaves a fresh scent in the oven.
This is a major advantage, especially in households with children and pets.
Cleaning your oven with natural household remedies is an eco-friendly, safe, and cost-effective alternative to chemical cleaners. It is gentle on the oven’s materials, protects your health, and is sustainable. With tried-and-true ingredients like baking soda, vinegar, or lemon, you can achieve sparkling results without any compromises.
Here is an overview of how you can clean your oven and its components with household remedies and how to use these remedies effectively:
Baking Soda:
Cleaning the oven with baking soda is one of the most effective home remedies, especially for burnt-on food residue. Baking soda acts as a mild abrasive and loosens stubborn grime. This home remedy is eco-friendly, effective against odors, breaks down grease, disinfects, and is completely non-toxic. It’s ideal for cleaning the oven’s side walls.
Instructions:
Mix three to four tablespoons of baking soda with a little water to form a paste. Spread the paste generously over the dirty and baked-on areas in the oven and let it sit overnight. For lighter stains, a few hours will suffice. The next day, you can wipe away the dried paste with a damp cloth or sponge and a little water. For stubborn encrustations, a dish sponge with a rough side works well. Then wipe the oven thoroughly with clean water to remove all baking soda residue.
Expert tip:
For particularly stubborn spots, you can lightly moisten the baking soda paste and let it sit a little longer.
Vinegar:
Vinegar is a tried-and-true home remedy for removing grease and limescale buildup in the oven. However, be careful not to let the vinegar come into contact with seals or delicate surfaces. Instructions: Mix vinegar and water in a 1:1 ratio in a spray bottle. Spray the solution onto the dirty areas in the oven and turn it on. Alternatively, you can let the vinegar solution evaporate in a heat-resistant dish inside the oven (similar to the lemon method). The steam loosens the grime, which can then be wiped away with a damp cloth after a short time.
Expert tip:
For stubborn limescale, you can mix the vinegar with baking soda. The chemical reaction between baking soda and vinegar enhances the cleaning effect. To do this, apply the mixture to the dirty surfaces and spray vinegar over it. Foam will form, which loosens stubborn grime. After 10–15 minutes, wipe the mixture away with a damp cloth.
Baking powder:
Baking powder is another gentle method that works similarly to baking soda. It’s ideal for cleaning the oven, especially for light to moderate stains.
Instructions:
Mix baking powder with a little water to form a paste. Apply the paste to the stained areas and let it sit for a few hours. Then wipe the paste off with a damp cloth or sponge.
Lemon/Acid:
Cleaning the oven with lemon is an excellent way to remove light stains while leaving a fresh scent in the oven. This home remedy is particularly well-suited for regularly cleaning light stains. The acid in the lemon also breaks down baked-on grease residue.
Instructions:
Slice a lemon and place the slices in a heat-resistant dish filled with water. Preheat the oven to 100 °C and place the dish inside for 30 minutes. The steam loosens the grime, which can then be easily wiped away.
If you don't have a lemon on hand, you can use citric acid powder. Dissolve it in warm water according to the dosage instructions on the package, and use it just like a lemon.
Expert tip:
You can also mix the juice of one lemon with a little water and spray the mixture onto the grime before preheating the oven. This method is also ideal for cleaning the oven with lemon.
Dishwasher tablets:
Dishwasher tablets are a practical solution for cleaning grease and heavily baked-on residue from ovens. Be sure to read the manufacturer’s instructions first, as this method is not suitable for all oven materials.
Instructions:
Dissolve a dishwasher tablet in hot water and apply the solution to the soiled areas with a sponge. Let the solution sit for 15–20 minutes, then wipe the oven thoroughly with clean water.
Baking soda:
is particularly effective against baked-on residue in the oven because it has a strong alkaline effect. Baking soda has a pH of about 11, which allows it to effectively dissolve grease, protein, and carbon-based residues. These properties make baking soda a powerful cleaning agent for encrusted or baked-on layers of dirt.
Directions:
Dissolve 1 tablespoon of baking soda in 1 liter of hot water. Apply the solution to the soiled surfaces and let it sit for 30 minutes. Wipe away the dirt with a damp sponge.
Expert tip:
For stubborn encrustations on baking sheets and racks, soaking them in a baking soda solution helps.
With Dr. Beckmann, cleaning your oven is a breeze
Regularly maintaining your oven ensures a longer lifespan and keeps it hygienically clean. Dirty ovens consume more energy and disrupt heat distribution, leading to higher costs and uneven cooking. But cleaning your oven regularly doesn’t have to be a tedious task. With tried-and-true household remedies like baking soda, lemon, and dishwasher tablets, even stubborn grime can be removed naturally.
In addition to natural household remedies, Dr. Beckmann offers specialized cleaning products for thorough oven care, guaranteeing high-quality standards. The gentle formulas protect the oven’s surfaces and prevent damage to the electronics.
It is important to follow your oven’s manufacturer’s instructions and observe safety precautions. With the right methods, a little patience, and regular care, your oven will shine again and bring you joy for years to come—for perfect baking results and a hygienically clean kitchen.